
In below video I demonstrate what I believe is the fastest way to colour correct in Adobe Premiere, when working with lots of footage. I’m not claiming this is the best method, just what I think is the fastest. This is a good technique if you don’t want to spend hours perfecting your shots but you still want them to look decent and consistent. So if you color correct wedding videos, documentaries, youtube videos, this can be very helpful.
In the video we go over 2 things:
1 – how a “decision tree” thought process can help you speed up your color workflow
2 – my specific “decision tree” when it comes to color. You can make your own, and it doesn’t have to just be for color, but I’ll show you what works for me in this context.
But what the heck is a decision tree? It is defined as:
A graphical representation of specific decision situations that are used when complex branching occurs in a structured decision process.
What!? For a basic example people do every day, think of the clothing decision one makes every day, and see below diagram:
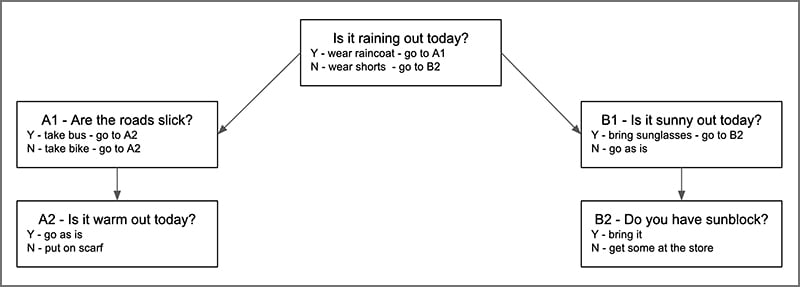
As you can see, we all use decision trees everyday in mundane situations. But if we’re smart, we should also use them as video editors, especially when optimizing our workflows.
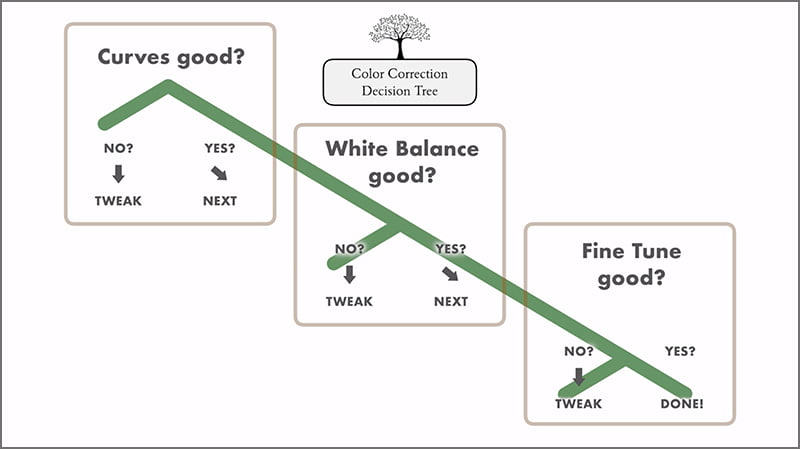
The technique we teach is a 3 step technique that includes:
1 – adjust CURVES for bulk global exposure adjustment.
2 – adjust WHITE BALANCE for correct color temperature and consistency.
3 – FINE TUNE with the sliders in the Basic panel of Lumetri.
I hope this helps to simplify things for you editors.
Thanks for reading and enjoy the video!

Meet your new assistant editor Shakefree
The AI plugin that edits while you shoot
Like this article? You’ll love Shakefree, an AI plugin that deletes the shaky parts of your b-roll. Try the AI for free.